Happy Winter Solstice! Sun and Moon Cakes

IMG_2002

IMG_1421

Well it is officially winter now. The world did not end, and tomorrow the days start to get a little bit longer. Not that I haven’t enjoyed the coziness of dark winter evenings, but I’m ready to start working back towards summer again. So lets celebrate with some little cakes. I’m calling them sun and moon cakes because the photos of them unintentionally ended up resembling such shapes, as well as the fact that in my mind the sun and the moon are the most fitting symbols of the solstices and equinoxes.

In reality these are “fairy cakes.” Apparently there are two camps, the fairy cake camp and the cupcake camp. I’m not sure if they are really at war, but they are definitely not friends. Are they so very different? I’m not sure. I know the recent cupcake fad seems to advocate topping cupcakes with enormous piles of buttercream, while the traditional fairy cake topping is a thin layer of icing sugar mixed with a bit of water (I don’t even know what it is called…). There are those who believe the fairy cake is a more subtle, humble and dignified mini cake. One might go as far to say it is “classier.” Having never eaten them side by side to compare, I have no idea which is better. But since my mom is Irish, she always made fairy cakes rather than cupcakes, so I follow in her footsteps. The texture is light and delicate, and the taste is quite lovely, with gentle hints of caramel (from the golden sugar) and vanilla. And besides, the name “fairy cakes” wins hands down.

These are two topping/filling variations on the same fairy cake recipe. The fairy cake recipe uses delightful ratios. It is roughly equal weights of golden sugar, butter, self-raising flour and eggs with a splash of milk and vanilla. For those of us who use cup measurements instead of measuring by weight, this kind of recipe is a pain in the bumface. But, heck, you really should have a little scale on hand for this kind of a thing, because measuring by volume doesn’t really allow you to experience the magic of the ratios of baking. One cup of one kind of flour/sugar/butter is not going to weigh the same as another. This recipe is worth weighing, so I’m not going to translate it into volume measurements for you. It is a fairy recipe. If you want to get really hardcore you can start by weighing two eggs (without the shell obviously). Then use that weight to determine the weight you will use of your other ingredients. Two of my eggs weighed about 130 grams, so that is what the recipe below follows.

Fairy Cakes

makes 12-16 little cakes

130 g butter
130 g golden sugar
2 eggs
1 tsp vanilla extract
130 g self raising flour (sift together 1 tsp of baking powder and 1/2 tsp salt with roughly 125 g all purpose flour, top up to 130 g)
3-4 tbsp milk

Preheat oven to 375 degrees F.

Beat the poop outta your soft butter and golden sugar. You want it to get really fluffy. I use a paddle attachment on high on my mixer for a good 5 min.

Beat in your eggs one at a time. If the batter starts to curdle add a couple of spoons of your self raising flour.

Add vanilla and mix until combined.

Fold in your flour mixture until just combined.

Add 3 tbsp of milk and stir gently. Check if a spoonful of the batter will plop off your spoon nicely. If it is too sticky add another bit of milk until it reaches the desired consistency.

This is the basic batter. What follows is the two variations for Sun and Moon Cakes that both use the above batter.

Sun Cakes (aka Honey Lemon Cream Butterfly Cakes)

Spoon fairy cake batter into paper cup-lined cupcake trays. Only fill them about half full. Bake for about 15 minutes or until golden.

While they are baking make the honey lemon cream. Once the cakes are cooked and cooled cut a small circle out of the top of each one. Slice this small circle in half to make two “butterfly wings”. Spoon lemon cream into the hole of the cake and position the wings on the lemon cream. Dust with icing sugar.

Honey Lemon Cream

adapted from The Homesteaders Kitchen.

2 large eggs
1/3 c honey
1/3 c fresh lemon juice
2 tsp lemon zest
1/4 c butter cut into small pieces

Whisk eggs and honey together in a bowl until fluffy. In a double boiler, mix egg mixture with lemon juice and rind. Stir this until it becomes thick. This takes a bit of time. It should become pretty thick so keep going. Don’t stop stirring. Once you get to a consistency where you can see the trail left by the spoon, remove from heat and stir in butter chunks. Allow to cool, stirring occasionally to prevent a “skin” from forming on the surface.

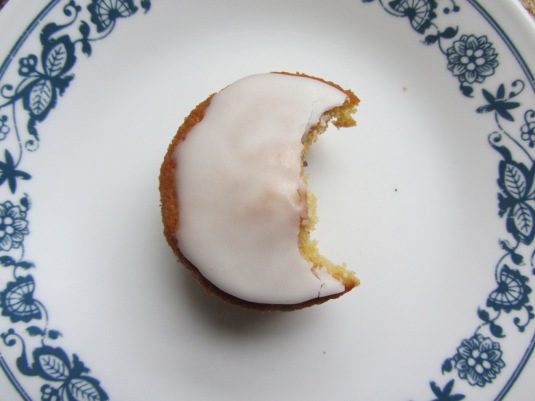
Moon Cakes (aka Jam filled Lemon Cakes)

Stir the rind of one lemon into your fairy cake batter.

Spoon muffin trays with batter to 1/3 full. Add a little dollop of raspberry jam, then top up with batter so they are just over half full. Bake for 15 min or until golden.

Once cool, ice with Lemon icing ( 1 cup icing sugar mixed with 1 tbsp lemon juice).

Take a bite so that it looks like a moon.

IMG_1417

Still to come….how to kidnap a Christmas tree…so far so good with ours, still seems pretty alive so I think we can share our tree-lovin’ tactics. I sure do love trees.

Winter Windows

It’s almost the winter solstice, which means that the days have almost reached their shortest, and will soon be getting longer again. The limited amount of daylight has seriously cut into the amount of food posts I have been interested in doing. I’ve been making lots of yummy winter foods, like veggie pot pie, and mushroom stroganoff, and some not-so-wintery but still delicious bison tacos with pear coleslaw and homemade corn tortillas. But with such limited opportunities for daylight photography of these dishes, they just end up looking all blurry and unappetizing. I simply can’t bear to post a recipe if the photo doesn’t look as good as the food tastes. I hate unappetizing photos of food.

christmas cactus bloom

Our Christmas cactus blooming right on time.

However, this being our first winter in our current house, I am really appreciating the winter light that we do have as it streams in our south facing windows (our previous abode had no south facing windows). In the summer our south-facing yard is completely overshadowed by an enormous tree, which is a blessing in the heat. Now all the leaves have fallen and the sun shines into our house from morning to late afternoon before it sets. The angled rays of winter sunshine sneak right in to the delight of all our house plants that have been growing and blooming quite happily. It makes the house feel so warm and bright.

meyer lemon flower

Our meyer lemon tree is flowering! The blossoms smell spectacular. RRTT has been playing honey bee and pollinating them with a paint brush in the hopes that we might get some little lemons!

When the sun goes down and we settle in for the long night again I find myself craving warm light and colour. As a result I have been taken with something that could be described as Christmas mania. For the first time ever I have actually felt a bit concerned that we may have too many Christmas lights up inside the house. I am the sort of person who has white Christmas lights up inside all year round (instead of lamps) for their warm cozy glow. I feel like I can get away with it with the clear ones, they’re not TOO festive? I did have a roommate admit to me once that he hated them and thought they were cheezy. But it obviously didn’t cut too deep because we still have them all over the place. And now we have more. Coloured ones as well. Not the LED ones, the “old-fashioned” ones. Currently we have 8 strings with 100 bulbs each. That’s 800 little Christmas lights in less than 500 sq ft. My excuse is that we can’t put them up outside because we don’t have any outdoor plugs.

craft table

Christmas mania is also manifesting in an overwhelming need to “craft.” I have all sorts of little craft projects that I’ve been working on night and day. Most of them I will refrain from posting about here because they are destined as Christmas presents for potential readers of this very blog. But I will show some of the “craft carnage” that is now permanently set up on our kitchen table.

yarn window

Dishy came over last week and brought some crafty paper ideas. We cut and glued and drank tea and ate little lemon cream fairy cakes and some purple veggie soup (purple cabbage…so tasty but so purple). There was some origami attempted…and some origami flung in frustration. I opted for the simpler task of making some construction paper bunting. It started with the word “LOVE.” I thought and thought about what word to put on the other window…JOY? PEACE? Nothing seemed quite true to our window. So I finally settled on LOVE YOU, which is something more of a sentence rather than just words. Is it weird? I don’t know. I like it. I tried not to get too Christmassy with it, in part because I wanted it to represent the winter solstice and in part because I think I secretly want to keep it up ALL YEAR LONG with all my Christmas lights. So we have a sun and a moon and two trees.

text bunting

So next post will be a recipe for my little honey lemon cream butterfly cakes. And perhaps some photos of our Christmas tree. Which we covertly DUG UP and is now sitting in a pot of soil drooping under the weight of all the Christmas lights. So yes, perhaps a post about how to kidnap a tree, dress it up for Christmas, have it as a house guest for the holidays and then politely replant it in the forest.

Apple Upside-down Apple Butter Apple Cake of Apples

Apple crumble. Apple cobbler. Apple butter. Apple jelly. Apple pie. Apple cider. Apple butter waffles. Apple apple apple. What a strange looking word. I find if I say (or write) a word enough times I can return to a state of mind where it is strange to me again. It’s like I am meeting apple for the first time, and feeling that it does not really suit the fruit it signifies.

apples

We have been inundated with apples since September. RRTT’s mom and pops have an old MacIntosh apple tree and we picked them all. There are finally only about 10 or so apples left, and all of the above apple products have been resorted to in dealing with them. The appliest apple moment of this apple mania was when I apple-upside-downed this recipe for apple butter bundt cake, resulting in the Apple Upside-down Apple Butter Apple Cake of Apples.

apple cake

I came across the recipe for apple butter bundt cake in the spring when I was trying to find a way to use up my apple butter from the previous summer. It resulted in the most hideous looking monster of a cake that luckily tasted quite good, and was lovely and moist and soft. Very soft. I brought it, still in the bundt pan, to a family dinner at my parents’ house. I turned it upside down to remove it from the pan and it did not come. I put a warm wet cloth on the outside of the bundt pan to loosen it from the pan gently (a trick of my mama’s). My youngest brother swaggered in and hit it with a thwack. The bottom half of my cake came out of the pan. The hideous cake that followed was as a result of numerous suggestions from the peanut gallery that went like this: “Stick it back together with jam and whipped cream…cover up the broken parts with a glaze…ewwww cover up the glaze with icing sugar…” it just went on and on. The cake was too heavy to have a layer of whipped cream in the middle. It just oozed out the side under the weight of the top layer, and my glaze was an awful improvised mixture of plum jam and icing sugar and too much water. And I didn’t have a sieve to sprinkle the icing sugar nicely…bad bad bad. By the time it was done I could not stop laughing.

ugly apple butter cake

Much love for the most hideous cake I’ve ever made.

This time I decided to abandon the bundt cake pan and use up more apples. If you don’t already have some nice homemade apple butter, check out the post for it. It is very easy and yummy, great for baking with, great for spreading on toast, or using to make your own bbq sauce for pork.

apple upside down cake
Apple Upside-down Apple Butter Apple Cake of Apples

*cake adapted from this recipe for Apple Bundt Cake on a funny blog called eggton

Upside-down apples:

3 apples
1 tbsp freshly squeezed lemon juice
1/3 c brown sugar
2 tbsp butter
1 tsp vanilla

Cake:

3 c. flour
2 tsp. baking soda
1 tsp. salt
1 1/2 tsp. cinnamon
1 c. butter (at room temperature)
1 1/3 c. packed brown sugar
1/3 c. honey
1 tsp. vanilla
2 eggs
2 c. apple butter

Preheat oven to 350 F.

Upside down apples:

Peel, core and slice the apples. Arrange them in the bottom of a 9 x 13″ greased pan. Sprinkle with lemon juice.

Melt butter in a small pot. Add brown sugar and vanilla and stir over medium heat until dissolved. Drizzle evenly over the apples in the pan.

apple cake

Cake:

Combine dry ingredients in a bowl (flour, baking soda, salt, cinnamon).

Beat butter with brown sugar until fluffy. Add honey and vanilla. Beat. Add eggs. Beat. Stir in apple butter (don’t beat or it will schlop everywhere).

Add dry ingredients to your wet ones. Stir until mixed. Pour into the greased pan on top of your apples and brown sugar mixture.

Bake until a toothpick comes out of the middle of the cake clean (about 45-60 min). Allow the cake to cool in the pan. Then loosen the sides of the cake and turn it upside down on a plate so that the apples are on top and the caramel oozes into the cake.

Previous Older Entries